Are you looking to learn about commuter bike light basics? This article is for you. (If you would rather watch this info, the video is at the bottom)
Now let’s talk Bike LIGHT BASICS!
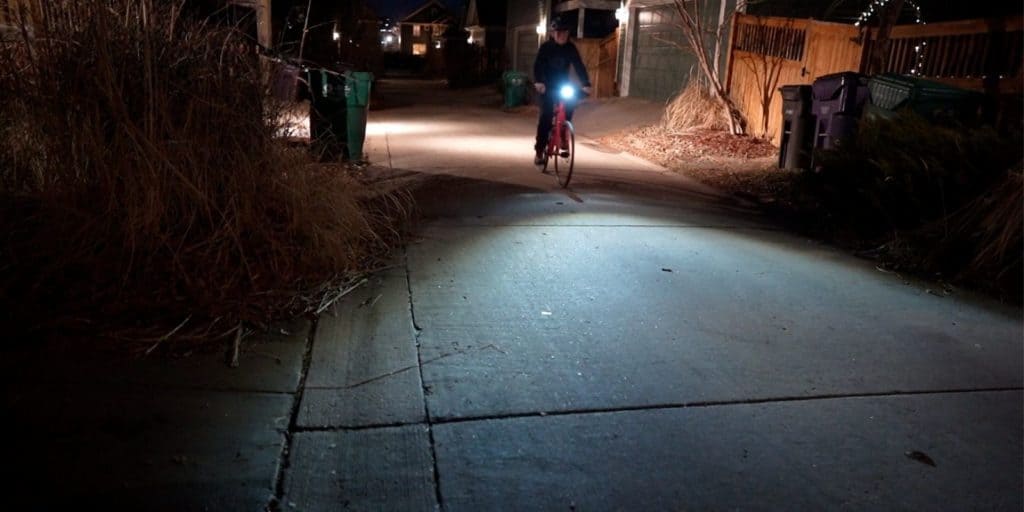
I absolutely love riding in the dark as long as I have the right bike light setup. In this article, we are going to be covering bike light basics so you can figure out what bike lights are best for you and your needs. There are a few basic thoughts we cover when we talk about bike lights:
- Do you want to see with your lights or just be seen for safety?
- How dark will it be?
- How fast are you going to be going?
- How long do you need the light to last?
The most critical question to ask yourself is, are you looking to be seen or to see with these bike lights?
This is probably the most important question to cover and helps determine what type of bike lights you should be looking for.
Do you need lights to be seen?
This is typically because you are either riding during the day and just want something with daytime running modes or at night where there are street lights that are providing enough lighting for you to see.

These are the most common lights to talk about. There are basic headlights and taillights, wheel lights you can add, helmets with built-in lights, and the list goes on. Make sure to check out the bike lighting category! I hope to be covering more about daytime running lights on bicycles in the future, but just know that I am a big fan of running bike lights during the day to catch people’s attention!
Do you need lights so you can see where you are going?
This is where things get a bit more in-depth for bike lights but don’t worry, I’ve got you covered. We now are going to be talking about light brightness and battery run time.
For light brightness, ask yourself how dark is it and how fast will you be going?
Why does speed matter? Because the faster you are going then the further you need to be able to see down the road. This gives you time to react if there is a pothole or to slow down to turn. In the city, I run anywhere from 150-400 lumens on my handlebar light. For dark paths where I’m going more than 15 MPH, I’m running anywhere from 400-1000 lumens.
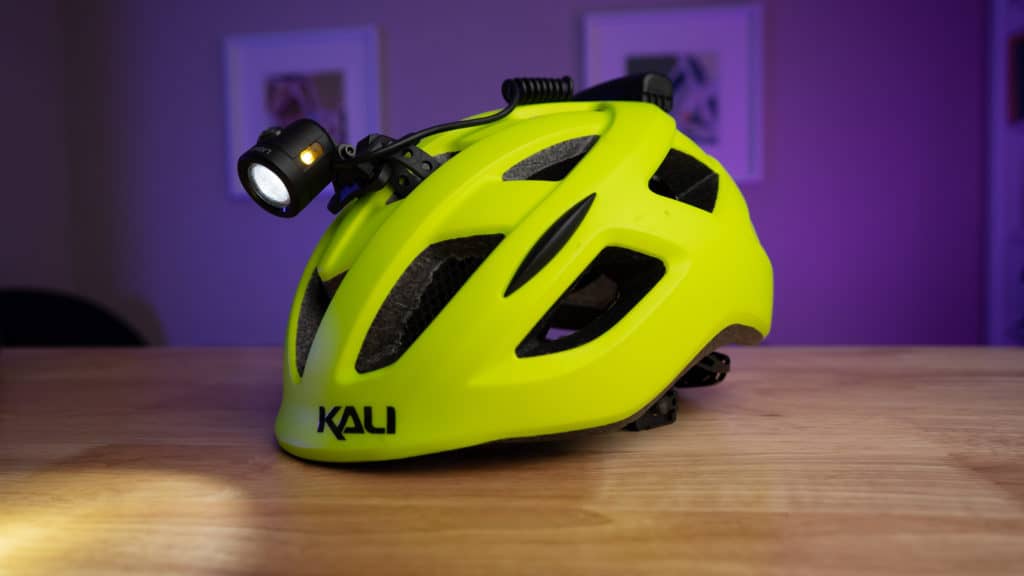
For the best visibility, it is worth noting that I’ll have my “city” friendly headlight on my handlebars but this limits where my light can shine, so on dark paths or when mountain biking I will also wear a headlight on my helmet, my goto is the Light & motion vis 360 due to its compact design but outputting a max of 600 lumens. I’ll be posting a review on this light soon.
Energy sources and runtime for bike lighting
For battery and energy, you have 4 sources of energy for bike lights that give you different brightness and runtime: Standard batteries, rechargeable batteries, dynamo lights, and e-bike lights.
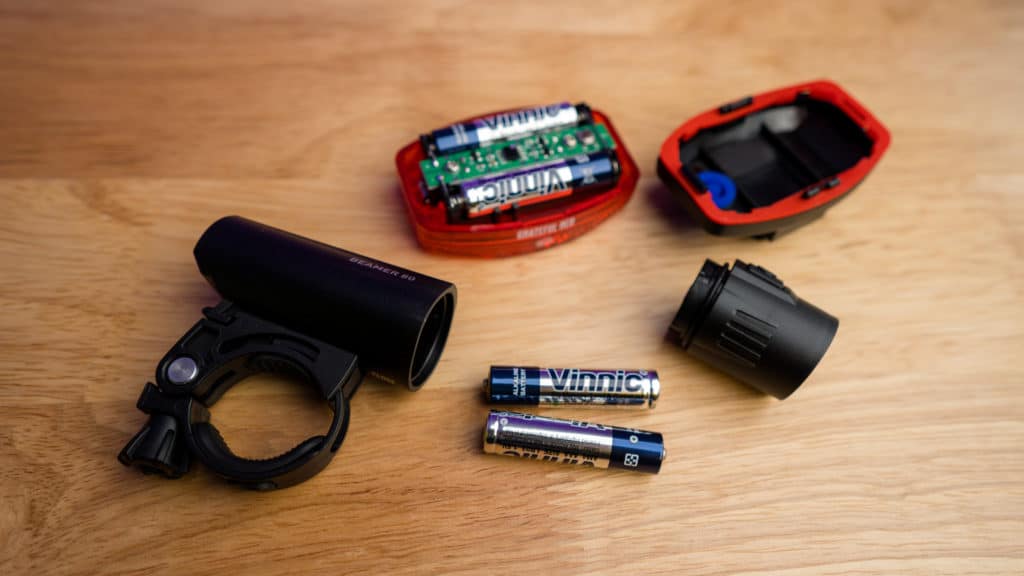
1. Standard Batteries, like AA and button batteries. These lights aren’t going to be as bright as the other options, but they are reliable because they can handle sitting around for months at a time or sitting in the cold. Also, they are the most affordable and a great option for people just getting started, or for a backup light set to keep in your bag. These lights start at $10 and go up to $60 or so for a set. Just take a note of warning to avoid button battery lights near small children as button batteries can be deadly if swallowed.

2. Rechargeable Batteries – These batteries are either built into the battery or externally so they can be swapped out. These are now some of the brightest types of lights available with good run times of 3+ hours for bright headlights and days of run time on the rear. These lights start about $30-40 for something reliable up to hundreds and hundreds of dollars for super bright race situation lighting. The downfall is that they do lose charge quickly in the cold, and you need to charge them when you need them as they don’t typically stay charged if you let them sit around like standard battery options. These often are the ones that need to be replaced the most often if you ride with them alllll year long and don’t have good battery hygiene (full article coming on this in the future) or in super cold conditions.
3. Dynamo Lights – I just did a couple of videos and articles on dynamo lights – these are my favorite lighting sources for everyday bikes because the front wheel creates energy for your lights. The basics are that you get a new front wheel, with the hub in the middle that generates power when it spins. The power then goes up to your light and has other features like powering a rear light and you can charge things from a USB charger. This makes it so if you are riding, you have light power, no batteries required! Full dynamo setups start at about $300 for a new wheel and headlight. My personal setup was about $700 for a high-quality front wheel and bright headlight/taillight. One last pro (I love these things!) is that the light and wheel are hard mounted to your bike so you don’t need to worry about people walking off with your lights when you lock up.

4. Electric Bike Lights – Most city electric bikes now come with bike lights that run off your massive e-bike battery making them reliable, and when you turn your e-bike on your lights are available for you to use. These lights typically come installed on your bike when you buy it but adding them later can be about $100-300 and will require some mechanical experience to install. These lights are typically perfect for city biking but I do add a helmet light to be able to sight my turns.
The last 2 options have the most advantages but also cost the most. They don’t require taking your lights off when you lock up or sit your bike out in the cold, and they are always there if you need them.
My Current Favorite Bike Lights
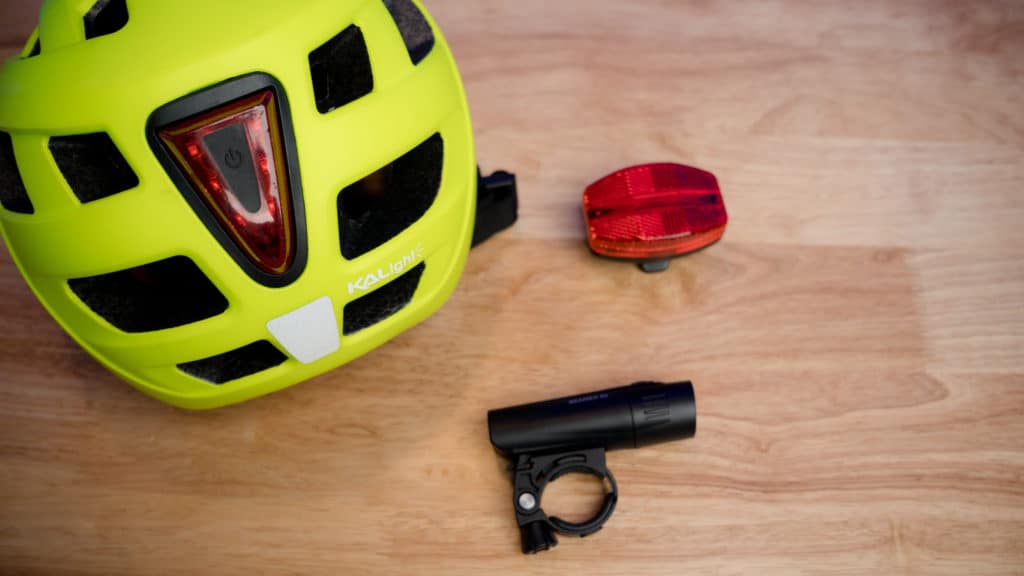
Budget Lights “To Be Seen”: Planet Bike Beamer 80 & Grateful Red Light Set
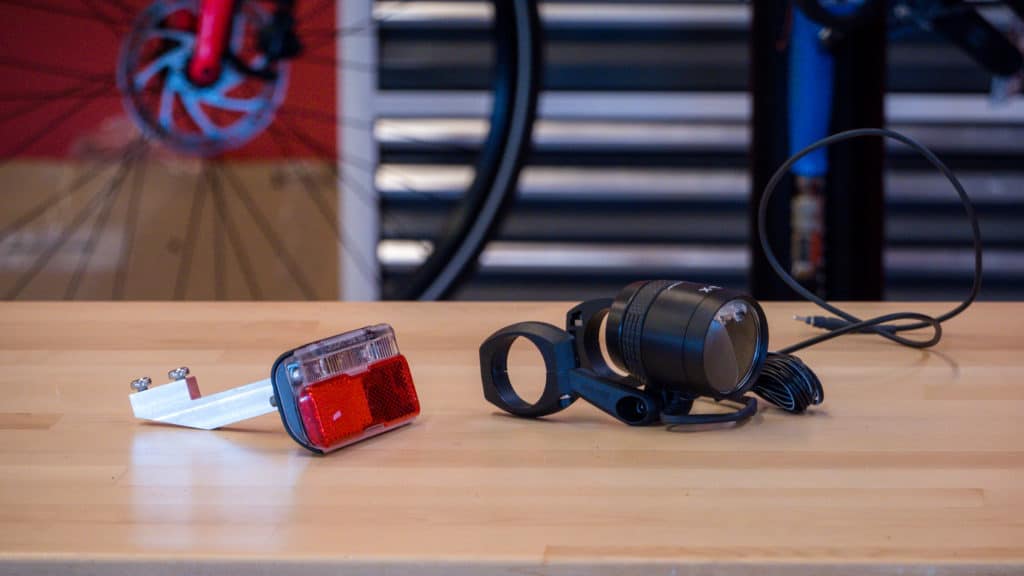
Basic “To See”: Kryptonite X6 & XBR Light Set
Helmet Light: Light & Motion Vis 360
Dynamo Lights: Busch & Müller IQ-X Dynamo Headlight
Bike Light Basic Conclusion
In general, think about whether you need to be seen or to see, how dark it will be, how fast you are going, and how long you need the battery to last. In addition, think about a couple of options, lights on your helmet, fairy lights around a city bike, or wheel lights to add some fun!
Finally, don’t be cheap. Stick with good brands that you can purchase from good retailers that have high-quality batteries and are designed to give you a long-lasting light. I’ve seen too many cheap lights fail after a day or two of use without any brand support or warranty.
Thanks for joining me on this bike lights basic article. I would love to hear from you, so if you have questions on bike lights or anything biking please add comments below!